「グラフをHTMLとCSSで楽に作りたいんじゃ!」
そんなあなたのためにHTMLとCSSで作る積み上げ横棒グラフを紹介します!

コピペでできるよ!
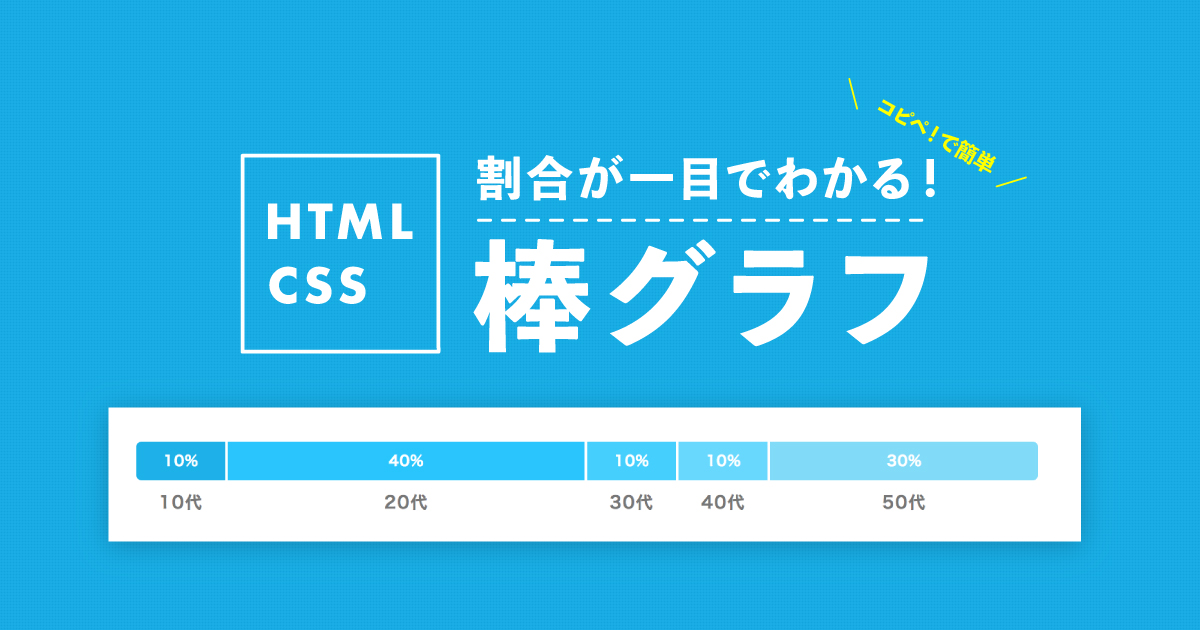
完成イメージはこんな感じです!
割合が一目でわかりますね!もう画像を作る必要はありません!
ちなみにWordPressをお使いの方のためにショートコードも用意しました。
簡単に挿入できますよ!
- レスポンシブ(スマホ)対応
- バリエーション5色(変更可)
- 最大10段階(増やそうと思えば無限)
- 簡潔なショートコード
- ラベルなどの表記は自由に変更可能
ショートコードを必要としない方はHTMLとCSSをコピペするだけで使えるようになります。
WordPressを使っていてHTMLに慣れていない人はショートコード推奨。
どんな環境でも使えると思いますが一応動作確認済みのWordPressテーマはこちら。
- Cocoon
- JIN
- SANGO
まずは使用感から紹介します!
割合がわかる積み上げ棒グラフの作り方
- STEP1CSSコピペstyle.cssにコードをコピペします。
- STEP2PHPコピペfunction.phpにコードをコピペします。
- STEP3ショートコード(HTML)入力ショートコードを入力します。
STEP1:CSSをコピペ
下記コードをコピペしてください。
「外観→テーマエディター→style.css(子テーマ)」。もしくは、「外観→カスタマイズ→追加CSS」に貼り付けてください。
/************************************
** 割合棒グラフ
************************************/
.percentage-bar-wrap{
  margin: 0 auto 4rem;/* 余白 */
  display:-webkit-box;
  display:-ms-flexbox;
  display:flex;
  -webkit-box-flex:1;
  -ms-flex:1;
  flex:1;
}
.percentage-bar-wrap > div:first-child{
  border-radius:4px 0 0 4px;
}
.percentage-bar-wrap > div:last-child{
  border-radius:0 4px 4px 0;
  margin-right: 0;
}
.percentage-bar{
  height: 30px;/* 棒高さ */
  margin-right: 2px;/* 棒余白 */
}
.percentage-bar-num{
  text-align:center;
  color:#fff;/* ラベル文字色 */
  line-height: 30px;
  font-weight: 600;/* ラベル文字太さ */
  font-size:11px;/* ラベル文字サイズ */
}
.percentage-bar-item{
  color:#777;/* コンテンツ文字色 */
  text-align:center;
  font-weight: 600;/* コンテンツ文字太さ */
  font-size:13px;/* コンテンツ文字サイズ */
  margin-top:5px;
  letter-spacing: 1px;
}
/*スマホ*/
@media screen and (max-width: 480px) {
  .percentage-bar-item{
      font-size:10px;/* コンテンツ文字サイズ */
    }
}
/* 青(デフォルト) */
.bar-blue > div:nth-of-type(1){background:#00b0eb;}
.bar-blue > div:nth-of-type(2){background:#14c4ff;}
.bar-blue > div:nth-of-type(3){background:#3bceff;}
.bar-blue > div:nth-of-type(4){background:#62d8ff;}
.bar-blue > div:nth-of-type(5){background:#7ddbfa;}
.bar-blue > div:nth-of-type(6){background:#00b0eb;}
.bar-blue > div:nth-of-type(7){background:#14c4ff;}
.bar-blue > div:nth-of-type(8){background:#3bceff;}
.bar-blue > div:nth-of-type(9){background:#62d8ff;}
.bar-blue > div:nth-of-type(10){background:#7ddbfa;}
/* ピンク */
.bar-pink > div:nth-of-type(1){background:#eb5555;}
.bar-pink > div:nth-of-type(2){background:#ef7878;}
.bar-pink > div:nth-of-type(3){background:#f39b9b;}
.bar-pink > div:nth-of-type(4){background:#f5adad;}
.bar-pink > div:nth-of-type(5){background:#f7bebe;}
.bar-pink > div:nth-of-type(6){background:#eb5555;}
.bar-pink > div:nth-of-type(7){background:#ef7878;}
.bar-pink > div:nth-of-type(8){background:#f39b9b;}
.bar-pink > div:nth-of-type(9){background:#f5adad;}
.bar-pink > div:nth-of-type(10){background:#f7bebe;}
/* 黄色 */
.bar-yellow > div:nth-of-type(1){background:#e3b047;}
.bar-yellow > div:nth-of-type(2){background:#fdc44f;}
.bar-yellow > div:nth-of-type(3){background:#fdc960;}
.bar-yellow > div:nth-of-type(4){background:#fdcf72;}
.bar-yellow > div:nth-of-type(5){background:#fdd583;}
.bar-yellow > div:nth-of-type(6){background:#e3b047;}
.bar-yellow > div:nth-of-type(7){background:#fdc44f;}
.bar-yellow > div:nth-of-type(8){background:#fdc960;}
.bar-yellow > div:nth-of-type(9){background:#fdcf72;}
.bar-yellow > div:nth-of-type(10){background:#fdd583;}
/* 緑 */
.bar-green > div:nth-of-type(1){background:#28ad98;}
.bar-green > div:nth-of-type(2){background:#2fcdb4;}
.bar-green > div:nth-of-type(3){background:#4dd6c0;}
.bar-green > div:nth-of-type(4){background:#6ddecc;}
.bar-green > div:nth-of-type(5){background:#7de1d1;}
.bar-green > div:nth-of-type(6){background:#28ad98;}
.bar-green > div:nth-of-type(7){background:#2fcdb4;}
.bar-green > div:nth-of-type(8){background:#4dd6c0;}
.bar-green > div:nth-of-type(9){background:#6ddecc;}
.bar-green > div:nth-of-type(10){background:#7de1d1;}
/* 対比 */
.bar-contrast > div:nth-of-type(1){background:#00bfff;}
.bar-contrast > div:nth-of-type(2){background:#ef7878;}
後半は色のバリエーションなので必要ない方は入れなくてもOKです!青はデフォルト設定なので入れておいてください。
なんとなくやってることわかると思うのですが1から10までカラーコードを設定しています。
色を変えたい場合はカラーコードを変更すればOKです!
色を追加する方法
オリジナルの色を作りたい場合、例えばグレーを入れるとしたら…
/* グレー */
.bar-grey > div:nth-of-type(1){background:カラーコード;}
.bar-grey > div:nth-of-type(2){background:カラーコード;}
.bar-grey > div:nth-of-type(3){background:カラーコード;}
.bar-grey > div:nth-of-type(4){background:カラーコード;}
.bar-grey > div:nth-of-type(5){background:カラーコード;}
.bar-grey > div:nth-of-type(6){background:カラーコード;}
.bar-grey > div:nth-of-type(7){background:カラーコード;}
.bar-grey > div:nth-of-type(8){background:カラーコード;}
.bar-grey > div:nth-of-type(9){background:カラーコード;}
.bar-grey > div:nth-of-type(10){background:カラーコード;}
bar-○○という名前でしたら何でも大丈夫です。
この○○の名前をショートコードに入れて呼び出すイメージです。
上記は10段階なので必要に応じて変更してください。
STEP2:function.phpにコードをコピペ
WordPressでショートコードを使う人は下記コードをfunction.phpにコピペしてください。

下記コードは当ブログでショートコードを作る際に毎回入力しています。下記記事のカスタマイズを行なっている方は飛ばしてください。
//ショートコードコンテンツ内に余計な改行や文字列が入らないように除外
if ( !function_exists( 'remove_wrap_shortcode_wpautop' ) ):
function remove_wrap_shortcode_wpautop($shortcode, $content){
  $pattern = '/\['.$shortcode.'.*?\].*?\[\/'.$shortcode.'\]/is';
  if (preg_match_all($pattern, $content, $m)) {
    $all = null;
    foreach ($m[0] as $code) {
      $all .= $code;
    }
    return $all;
  }
}
endif;
続いてこちらのコードをコピペしてください。

//割合棒グラフショートコード
add_shortcode('percentage-bar', 'percentage_bar_shortcode');
if ( !function_exists( 'percentage_bar_shortcode' ) ):
function percentage_bar_shortcode( $atts, $content = null ){
extract( shortcode_atts( array(
    'color' => 'blue',
  ), $atts ) );
  $content = remove_wrap_shortcode_wpautop('bar', $content);
  $content = do_shortcode( shortcode_unautop( $content ) );
  return '<div class="percentage-bar-wrap bar-'.$color.'">'.
              $content.
          '</div>';
}
endif;

//割合棒グラフショートコード中身
add_shortcode('bar', 'percentage_bar_item_shortcode');
if ( !function_exists( 'percentage_bar_item_shortcode' ) ):
function percentage_bar_item_shortcode( $atts, $content = null ){
  extract( shortcode_atts( array(
    'num' => null,
    'label' => null,
  ), $atts ) );
  $content = do_shortcode( shortcode_unautop( $content ) );
  return '<div class="percentage-bar" style="flex:'. $num .';">'.
            '<div class="percentage-bar-num">'.$label.'</div>'.
             '<div class="percentage-bar-item">'.$content.'</div>'.
         '</div>';
}
endif;
これでショートコードが使えるようになりました。
STEP3:ショートコード(HTML)入力
WordPressであれば投稿画面を開きましょう!
HTMLの方はHTMLを入力してください。
<div class="percentage-bar-wrap bar-blue">
  <div class="percentage-bar" style="flex:10;">
    <div class="percentage-bar-num">10%</div>
    <div class="percentage-bar-item">10代</div>
  </div>
  <div class="percentage-bar" style="flex:40;">
    <div class="percentage-bar-num">40%</div>
    <div class="percentage-bar-item">20代</div>
  </div>
  <div class="percentage-bar" style="flex:10;">
    <div class="percentage-bar-num">10%</div>
    <div class="percentage-bar-item">30代</div>
  </div>
  <div class="percentage-bar" style="flex:10;">
    <div class="percentage-bar-num">10%</div>
    <div class="percentage-bar-item">40代</div>
  </div>
  <div class="percentage-bar" style="flex:30;">
    <div class="percentage-bar-num">30%</div>
    <div class="percentage-bar-item">50代</div>
  </div>
</div>
flexを使って割合を表現しています。
WordPressのショートコード書き方
[percentage-bar color="pink"]
[bar num="10" label="10%"]10代[/bar]
[bar num="20" label="40%"]20代[/bar]
[bar num="30" label="10%"]30代[/bar]
[bar num="10" label="10%"]40代[/bar]
[bar num="30" label="30%"]50代[/bar]
[/percentage-bar]

- color:色指定
- num:割合
- label:棒上文字
- 間のやつ:棒下文字
色指定はCSSの後半にはる「bar-○○」の○○を入れればOK。
colorを入れないと青になります。
- pink
- yellow
- green
- contrast
以上です!おつかれさまでした!
導入済みのブログ、サイト紹介させてください
「この記事を見て導入したよ!」という方でSNSやブログでこの記事を紹介していただいた場合、こちらでブログを紹介させていただきます!
ご連絡お待ちしております!


コメント
thethorで試したら、一つ目の要素だけ上に上がってしまいます。
.content div{margin-top:2rem;}を消すと、並びますが、そうすると全てのdivのmargin-topがなくなってしまうので、対策教えて欲しいです。
返信遅くなりまして申し訳ございません。
一つ目の要素が上にあがるというのが具体的にイメージできないのですが
CSSで
.percentage-bar-wrap > div:first-child{
margin-top:0;
}
とかはいかがでしょうか?
いつも楽しいカスタマイズをありがとうございます。
棒グラフをWordpressのテーブル内に挿入したところ、灰色のラベルが下のセルにはみ出して、文字と被って表示されてしまいます。
全ての要素をセルの中に収めるには、どの部分を変更したらいいのでしょうか?
すいません、ラベルではなく「コンテンツ」の話でした。
棒グラフの下についている灰色の文字のことです。
よろしくお願いします。
0%でも少しあるように表示されてしまうのは仕様ですか?